


Installation Instructions for our PLATEMATE Flexi Brackets
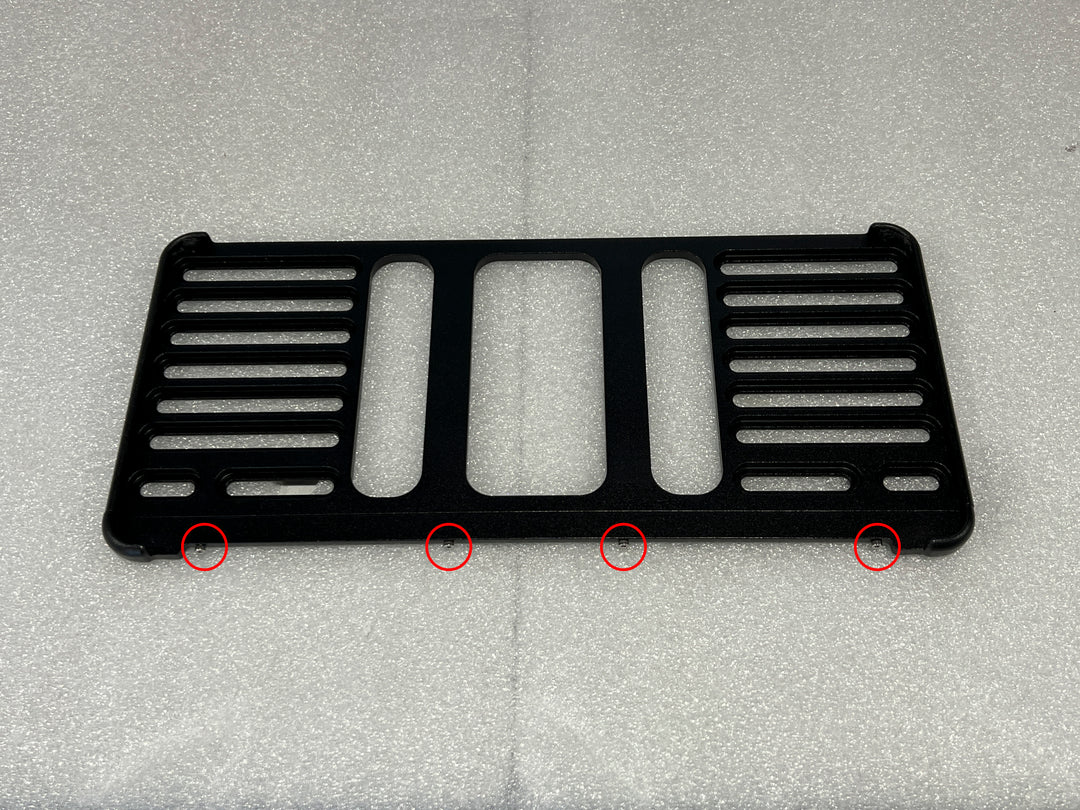
STEP 1
Using the Allen Key supplied remove the four (4) M2 bolts from the brackets as pre-installed for shipping.

Step 2
Install the first (larger) component using M6 Screws (supplied) or reusing the existing hardware if M6 screws are incompatible
Note: Ensure alternative hardware does not protude high than groves in the bracket
Step 3 Option One
While the Bracket is Installed on the Car.
Install the Flexi Number Plate by sliding the plate up from the bottom of the bracket
Note: Brackets are shipped with small amounts of adhesive putty in the top left, and right corners allowing for PPQ manufacturing tolerances and preventing vibration. Removal of some of this putty may be required after the initial test fit
Step 3 Option Two
Alternative Option for Installation where there is limited spacing to slide the plates in
While the Bracket is installed on the car
Start by placing the plate in the groove on one side, and flexing the plate into the bracket as shown in the video. Slide up itno place once both sides are in the groove
Step 4
Install the bracket piece and screws removed in Step 1
Be careful not to over-tighten the screws
If you have any issues with installation, please don't hesitate to contact us via email:
sales@theplatebracket.com.au